- HTTPS服务
- 准备工作
- 示例代码
- HTTPS与HTTP支持
- 使用Let’s Encrypt免费证书
- 安装Certbot
- 申请证书
- 使用证书
- 证书续期
HTTPS服务
建立HTTPS服务非常简单,使用框架Web Server提供的EnableHTTPS(certFile, keyFile string) error方法即可。很显然,该方法中需要提供两个参数,即两个用于HTTPS非对称加密的证书文件以及对应的秘钥文件。
准备工作
在本地演示的需要,我们可以使用openssl命令生成本地用于测试的证书和对应的秘钥文件。命令如下:
- 使用常用的RSA算法生成秘钥文件
此外,我们也可以使用ECDSA算法来生成秘钥文件:openssl genrsa -out server.key 2048
openssl ecparam -genkey -name secp384r1 -out server.key
- 根据秘钥文件生成证书文件
openssl req -new -x509 -key server.key -out server.crt -days 365
- (可选)根据秘钥生成公钥文件,该文件用于客户端与服务端通信
openssl rsa -in server.key -out server.key.public
openssl支持的算法以及命令参数比较多,如果想要深入了解请使用man openssl命令进行查看。本次示例中,本地环境(Ubuntu)使用命令生成相关秘钥、公钥、证书文件的流程如下:
john@johnhome:~/https$ openssl genrsa -out server.key 2048Generating RSA private key, 2048 bit long modulus.........................+++.....................................................................+++unable to write 'random state'e is 65537 (0x10001)john@johnhome:~/https$ openssl req -new -x509 -key server.key -out server.crt -days 365You are about to be asked to enter information that will be incorporatedinto your certificate request.What you are about to enter is what is called a Distinguished Name or a DN.There are quite a few fields but you can leave some blankFor some fields there will be a default value,If you enter '.', the field will be left blank.-----Country Name (2 letter code) [AU]:CHState or Province Name (full name) [Some-State]:SiChuanLocality Name (eg, city) []:ChengduOrganization Name (eg, company) [Internet Widgits Pty Ltd]:John.cnOrganizational Unit Name (eg, section) []:DevCommon Name (e.g. server FQDN or YOUR name) []:JohnEmail Address []:john@johng.cnjohn@johnhome:~/https$ openssl rsa -in server.key -out server.key.publicwriting RSA keyjohn@johnhome:~/https$ lltotal 20drwxrwxr-x 2 john john 4096 Apr 23 21:26 ./drwxr-xr-x 90 john john 4096 Apr 23 20:55 ../-rw-rw-r-- 1 john john 1383 Apr 23 21:26 server.crt-rw-rw-r-- 1 john john 1675 Apr 23 21:25 server.key-rw-rw-r-- 1 john john 1675 Apr 23 21:26 server.key.public
其中,生成证书的命令提示需要录入一些信息,可以直接回车留空即可,我们这里随便填写了一些。
示例代码
根据以上生成的秘钥和证书文件,我们来演示如果使用ghttp.Server实现一个HTTPS服务。示例代码如下:
package mainimport ("github.com/gogf/gf/g/net/ghttp")func main() {s := ghttp.GetServer()s.BindHandler("/", func(r *ghttp.Request){r.Response.Writeln("来自于HTTPS的:哈喽世界!")})s.EnableHTTPS("/home/john/https/server.crt", "/home/john/https/server.key")s.SetPort(8199)s.Run()}
可以看到,我们直接将之前生成的证书和秘钥文件地址传递给EnableHTTPS即可,通过s.SetPort(8199)设置HTTPS的服务端口,当然我们也可以通过s.SetHTTPSPort(8199)来实现,在单一服务下两者没有区别,当Web Server需要同时支持HTTP和HTTPS服务的时候,两者的作用就不同了,这个特性我们会在后面介绍。随后我们访问页面https://127.0.0.1:8199/来看一下效果: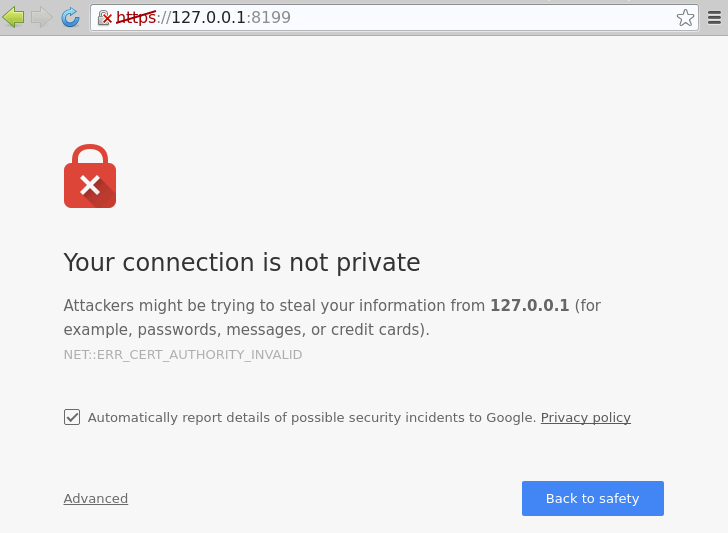 可以看到浏览器有提示信息,主要是因为我们生成的证书为私有的,非第三方授信企业提供的。浏览器大多会自带一些第三方授信的HTTPS证书机构,这些机构提供的HTTPS证书被浏览器认为是权威的、可信的,才不会出现该提示信息。一般这种第三方权威机构授信证书价格在每年几千到几万人民币不等,感兴趣的朋友可在搜索引擎上了解下。
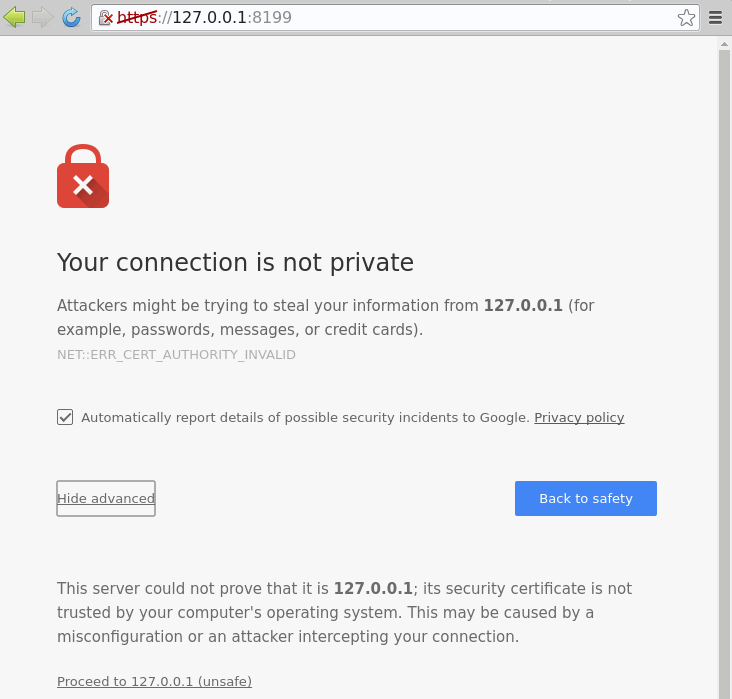 我们这里直接点击“Advanced”,然后点击“Proceed to 127.0.0.1 (unsafe)”,最终可以看到页面输出预期的结果:
HTTPS与HTTP支持
我们经常会遇到需要通过HTTP和HTTPS来提供同一个服务的情况,即除了端口和访问协议不一样,其他都是相同的。如果按照传统的使用多Web Server的方式来运行的话会比较繁琐,为轻松地解决开发者的烦恼,ghttp提供了非常方便的特性:支持 “同一个”Web Server同时支持HTTPS及HTTP访问协议。我们先来看一个例子:
package mainimport ("github.com/gogf/gf/g/net/ghttp")func main() {s := ghttp.GetServer()s.BindHandler("/", func(r *ghttp.Request){r.Response.Writeln("您可以同时通过HTTP和HTTPS方式看到该内容!")})s.EnableHTTPS("/home/john/https/server.crt", "/home/john/https/server.key")s.SetHTTPSPort(443)s.SetPort(80)s.Run()}
执行后,通过本地浏览器访问这两个地址http://127.0.0.1/和https://127.0.0.1/都会看到同样的内容(需要注意的是,由于部分系统对于权限的限制,Web Server绑定80和443端口需要root/管理员权限,如果启动报错,可以更改端口号后重新执行即可)。
在本示例中,我们使用了两个方法来开启HTTPS特性:
func (s *Server) EnableHTTPS(certFile, keyFile string) errorfunc (s *Server) SetHTTPSPort(port ...int) error
一个是添加证书及密钥文件,一个是设置HTTPS协议的监听端口,一旦这两个属性被设置了,那么Web Server就会启用HTTPS特性。并且,在示例中也通过SetPort方法来设置了HTTP服务的监听端口,因此该Web Server将会同时监听指定的HTTPS和HTTP服务端口。
使用Let’s Encrypt免费证书
SSL免费证书机构比较多,如:
腾讯云DV SSL 证书: https://cloud.tencent.com/product/sslLet’s Encrypt: https://letsencrypt.org/CloudFlare SSL: https://www.cloudflare.com/StartSSL: https://www.startcomca.com/Wosign沃通SSL: https://www.wosign.com/loovit.net AlphaSSL: https://www.lowendtalk.com/entry/register?Target=discussion%2Fcomment%2F2306096
以下以Let's Encrypt为例,介绍如何申请、使用、续期免费证书。
Let’s Encrypt官网地址:https://letsencrypt.org/
以下以Ubuntu系统为例,如何申请Let's Encrypt免费证书及在gf框架下对证书的使用。
安装Certbot
Certbot官网地址:https://certbot.eff.org/
申请Let’s Encrypt免费证书需要使用到certbot工具:
sudo apt-get updatesudo apt-get install software-properties-commonsudo add-apt-repository ppa:certbot/certbotsudo apt-get updatesudo apt-get install certbot
申请证书
使用以下命令:
certbot certonly --standalone -d 申请域名 --staple-ocsp -m 邮箱地址 --agree-tos
例如:
root@ip-172-31-41-204:~# certbot certonly --standalone -d goframe.org --staple-ocsp -m john@goframe.org --agree-tosSaving debug log to /var/log/letsencrypt/letsencrypt.logPlugins selected: Authenticator standalone, Installer NoneStarting new HTTPS connection (1): acme-v02.api.letsencrypt.orgObtaining a new certificatePerforming the following challenges:http-01 challenge for goframe.orgWaiting for verification...Cleaning up challengesIMPORTANT NOTES:- Congratulations! Your certificate and chain have been saved at:/etc/letsencrypt/live/goframe.org/fullchain.pemYour key file has been saved at:/etc/letsencrypt/live/goframe.org/privkey.pemYour cert will expire on 2019-01-25. To obtain a new or tweakedversion of this certificate in the future, simply run certbotagain. To non-interactively renew *all* of your certificates, run"certbot renew"- If you like Certbot, please consider supporting our work by:Donating to ISRG / Let's Encrypt: https://letsencrypt.org/donateDonating to EFF: https://eff.org/donate-le
默认情况下,证书会被安装到/etc/letsencrypt/,证书和私钥文件分别为:
/etc/letsencrypt/live/goframe.org/fullchain.pem/etc/letsencrypt/live/goframe.org/privkey.pem
使用证书
package mainimport ("github.com/gogf/gf/g/net/ghttp")func main() {s := ghttp.GetServer()s.BindHandler("/", func(r *ghttp.Request){r.Response.Writeln("来自于HTTPS的:哈喽世界!")})s.EnableHTTPS("/etc/letsencrypt/live/goframe.org/fullchain.pem", "/etc/letsencrypt/live/goframe.org/privkey.pem")s.Run()}
证书续期
证书默认有效期为3个月,到期后需要手动续期,使用以下命令:
certbot renew
我们可以使用crontab定时任务来实现自动续期:
# 每天尝试续期一次,成功后重启`gf`框架运行的Web Server0 0 * * * certbot renew --quiet --renew-hook "kill -SIGUSR1 $(pidof 进程名称)"
